/
Blog
/ How to Choose Between Sheet Metal Enclosure Styles
How to Choose Between Sheet Metal Enclosure Styles
2020-02-20
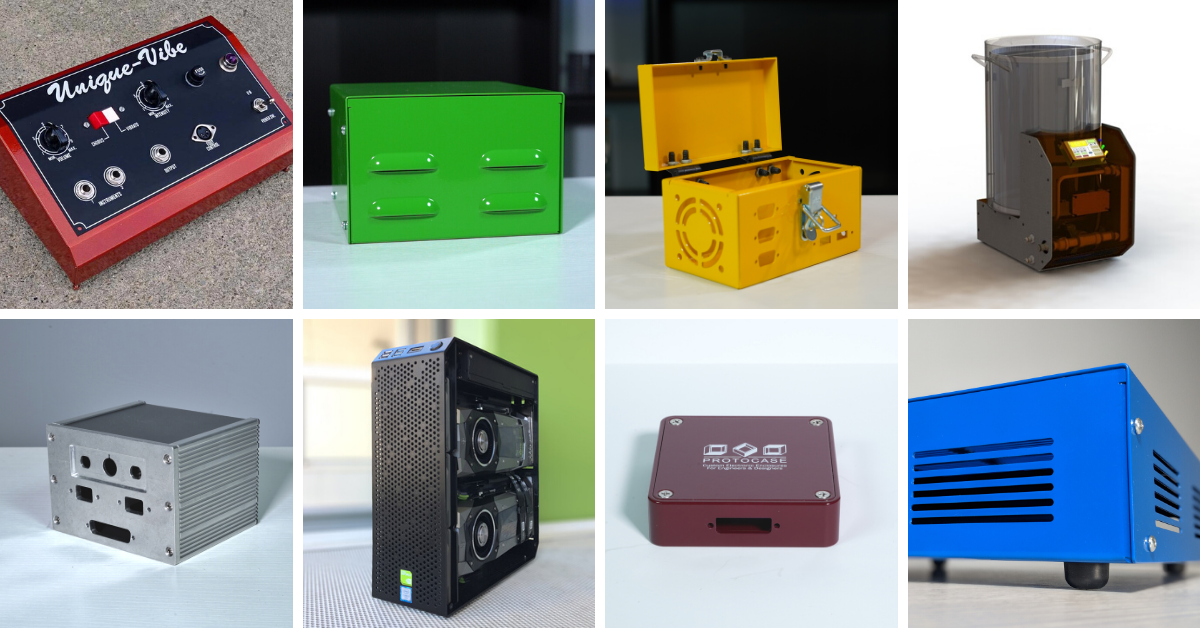
Here at Protocase, we can make just about any kind of sheet metal or CNC machined enclosure. Whatever you’re envisioning, we can build your design in 2-3 days (with no minimum order). We have plenty of templated sheet metal enclosure styles for you to choose from.
From rackmounts to consolets, L-shape and everything in between, there are many enclosure styles that we offer, which can be customized to fit the requirements of each individual customer. With that many options available, it can sometimes be overwhelming sifting through all of the possibilities, especially if you are unfamiliar with sheet-metal design and fabrication.
So, how do you decide which one you should use? In this blog, I am going to review each of the different enclosure styles in which we specialize, and for which situations they’re best suited.
In order to determine your best option, I recommend first asking yourself a few questions:
Where will my enclosure need to be stored?
What electronics and components will be housed within the enclosure?
Where will these electronics and components need to be placed?
How durable do I need this enclosure to be?
Once you’ve answered those questions, this enclosure style guide should be able to point you in the right direction. (And we’re always here to help if you want to chat through your vision and requirements!).
We will start off with two of the most common enclosure types, U-Shape and L-Shape. While the two appear very similar, they do have distinct differences, and there are situations in which you should choose one over the other.
Sometimes called a “clamshell,” a U-Shape enclosure design is highly versatile, and can solve a number of issues even in its most standard form. You can easily determine that it’s a U-Shape because each of the two parts of the enclosure form a U-like shape.
The bottom piece of a U-Shape enclosure has the shape of a U.
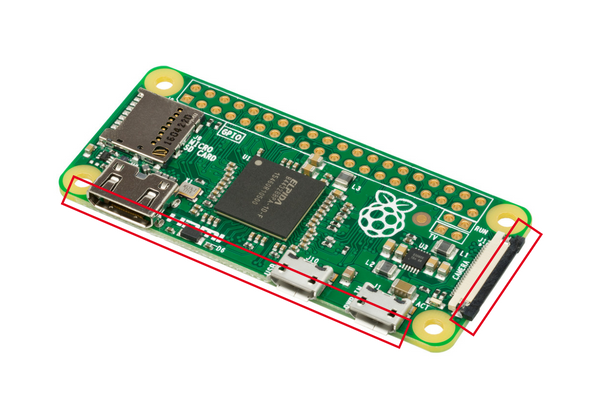
U-Shape enclosures are an excellent option because there are fewer design constraints (such as cover height or the need for welding on the cover), which make U-Shapes an ideal choice if you’re new to sheet-metal design. In fact, I’d consider the U-Shape the simplest to design and manufacture. It’s also an excellent option to use when you have a component that protrudes from adjacent (meaning neighboring) sides, such as a circuit board.
Printed circuit board with connectors that protrude on neighboring (adjacent) sides
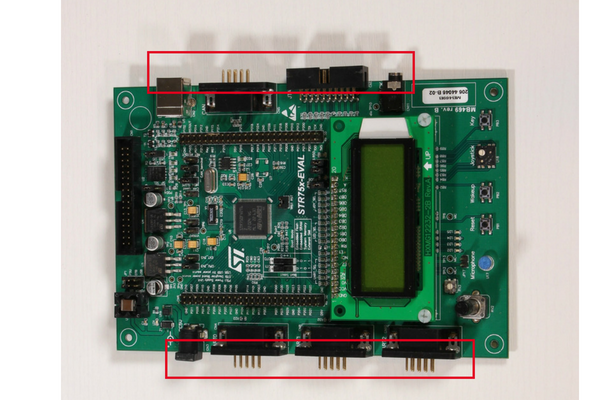
But if the enclosure is to accommodate a component that protrudes from opposite sides, such as a PCB with opposing connectors as shown below, the U-Shape would only work if you force the PCB card into place, but I really don’t recommend that option!
Photo of a printed circuit board with protruding connectors on opposing sides
Because the connectors protrude through each side of the enclosure, you cannot insert the PCB into a U-Shape unless you stretch at least one side of the enclosure, which would most likely result in the enclosure being out of position when you bend it back.
In this situation, you would be better off using an L-Shape enclosure.
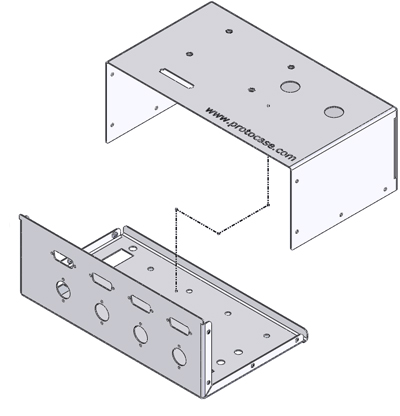
Unlike the U-Shape enclosure, in which its two parts resemble the letter “U,” one of the two pieces in an L-Shape resembles, as you might guess, the letter “L.”
Wireframe of L-Shape Enclosure
While similar to the common U-Style enclosure, Protocase’s two-piece L-Shaped enclosures have distinct differences which make them ideal for PCB enclosure designs with connectors protruding from multiple/opposite sides.
An L-Shape enclosure’s open area on one side of its bottom piece (the piece that resembles an L) will allow this type of PCB to slide right into the side of the enclosure.
L-Shape Enclosure with printed circuit board installed.
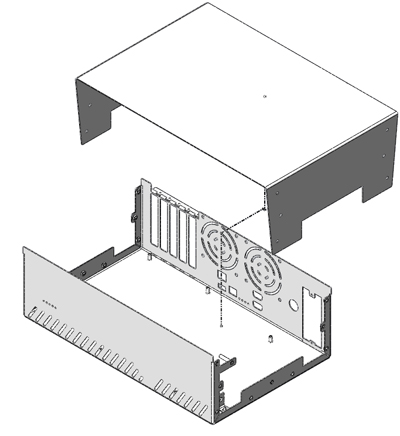
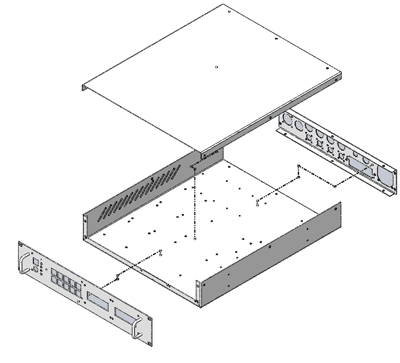
A rackmount enclosure is designed to be mounted in a racked cabinet. It can either be affixed into the cabinet using the flanges on the front panel (or rackmounting ears), or the enclosure may have side rails that allow for easy access from the cabinet. This style of enclosure is commonly used for small and large servers.
The front panel of a rackmount enclosure is always 19” (482.6mm) wide, whereas the chassis itself is typically 16.75” (425.45mm) wide. We can achieve any chassis width up to 17.5” (444.5mm), as that is the maximum width that will fit between most mounting rails.
Wireframe of rackmount enclosure
Rackmount enclosures are measured and classified by “U,” which refers to the height of the enclosure’s front panel. Each “U” equals 1.75” (44.45 mm) – we can manufacture any U height, but most mounting racks can only fit a maximum 42U height. Technically, 1U is 1.75″, but we manufacture custom rackmount enclosures to be 0.03″ shorter than the specified U height in order to allow for proper clearances between the enclosures when they’re racked in a cabinet. Going 0.03″ shorter also allows for our manufacturing tolerances.
Additionally, Protocase-manufactured rackmount enclosures typically have the top and bottom of the enclosure inset 0.125″ from the top and bottom edges of the front panel. This is to allow for screw-head clearance outside the case for any components mounted inside the case. If you require the top and bottom of the enclosure to be flush with the top and bottom of the front panel, you should specify you require a full-height rackmount enclosure, as it will not have the 0.125″ offset.
As with all enclosure styles, we recommend adding ventilation cutouts to help keep the housed electronics cool. A rackmount enclosure is no different, especially since it will be stored within a racked cabinet, where air circulation isn’t optimal in those environments. (For enclosures containing higher-power electronics, forced air ventilation in the form of fans may also be necessary).
Common uses:
To support server applications
Cases for personal PCs that are to be rack-mounted
To house any other components that are required to be mounted on a rack or slide
Protocase manufactures the rackmount enclosures that are used for 45Drives’ ultra-large, customizable data storage servers called Storinators. You can learn more about 45Drives’ and its products here.
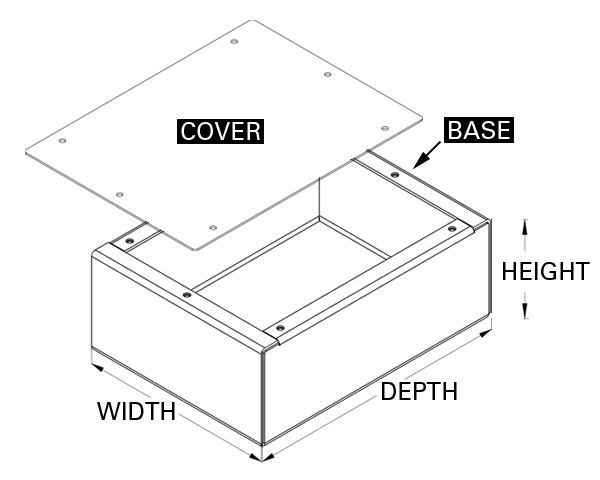
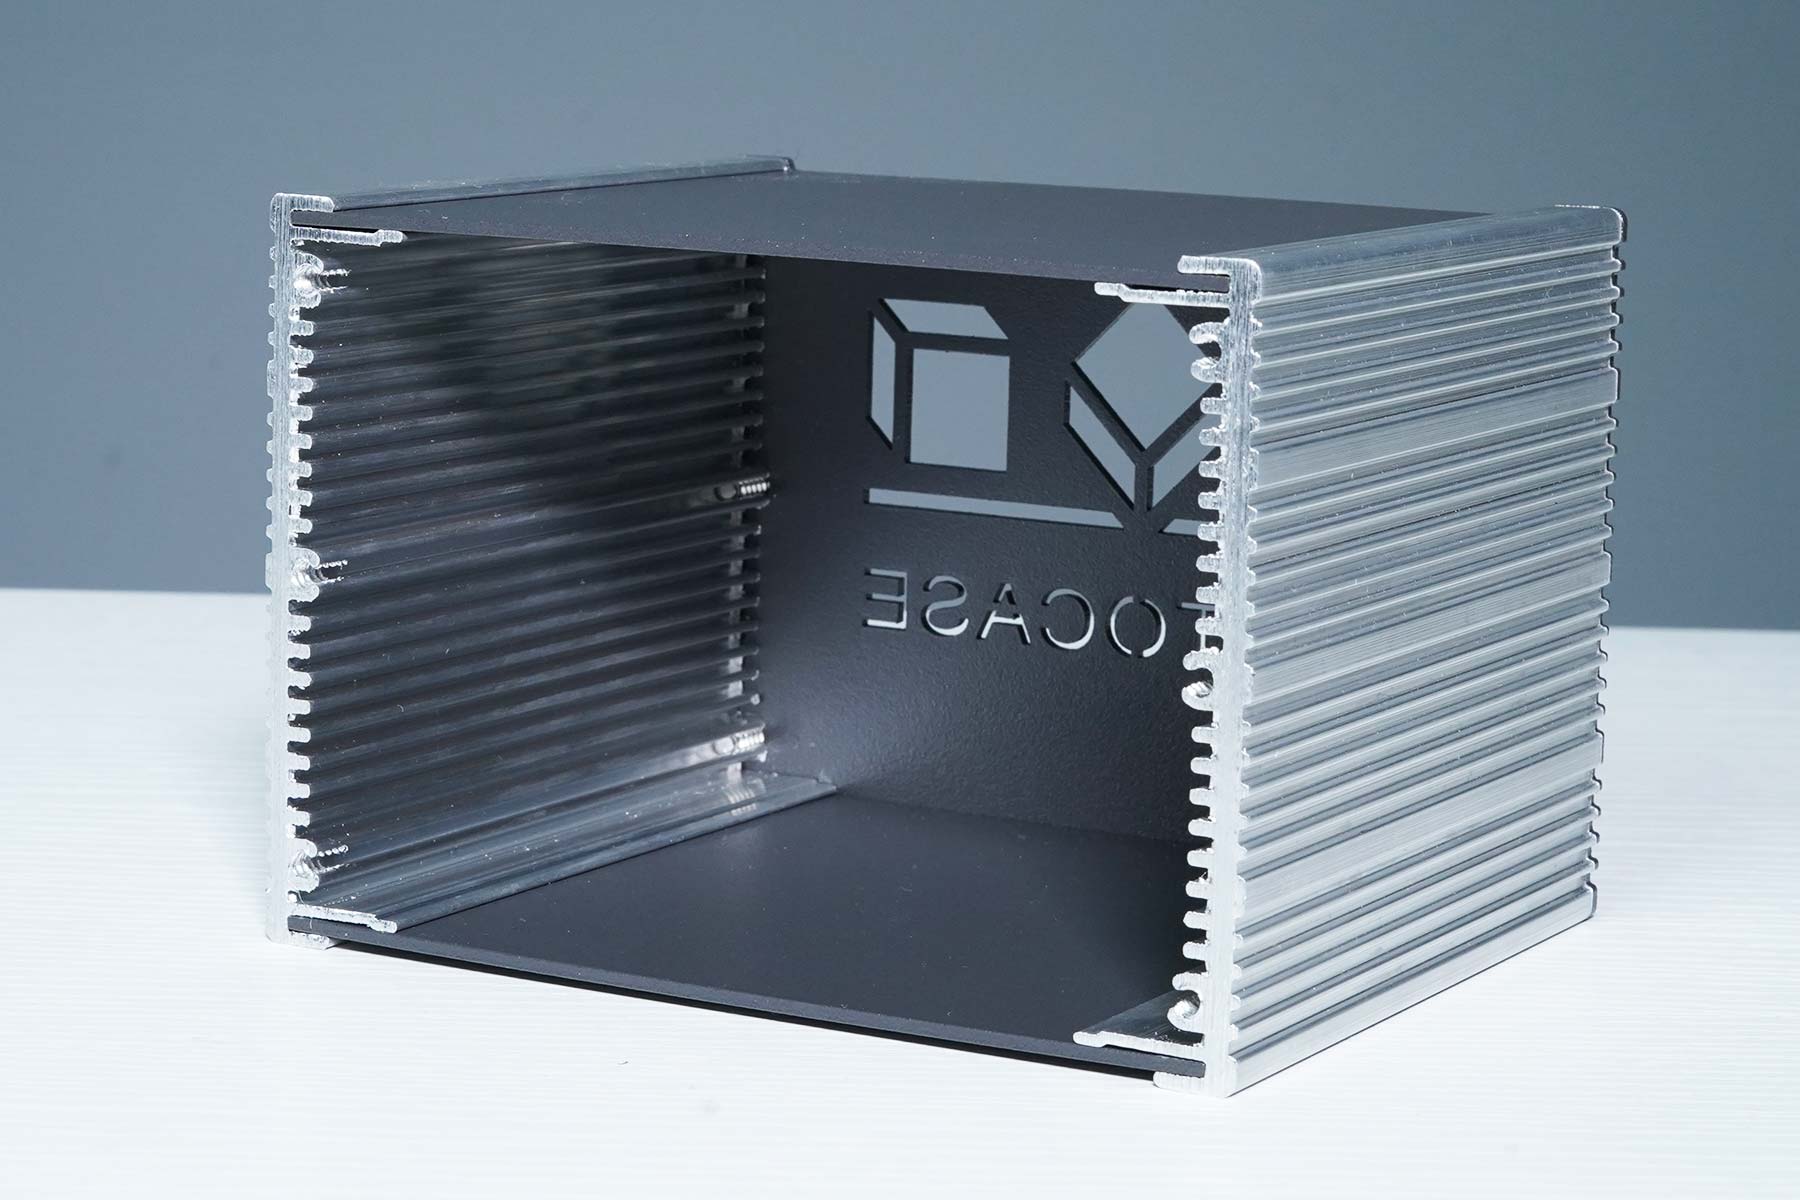
The key defining characteristic of a 5-sided enclosure is its makeup of four sides and a removable top/cover. The removable top/cover makes it an extremely versatile enclosure style, as the top can be converted to a door or lid by adding a hinge and a latch.
Diagram of 5-Sided Enclosure
Depending on your needs, a 5-sided enclosure can be used as a portable cabinet, or wall-mounted.
Five-sided enclosures are also versatile because we can sub-divide the sides, if you require the sides to be removable for easy access.
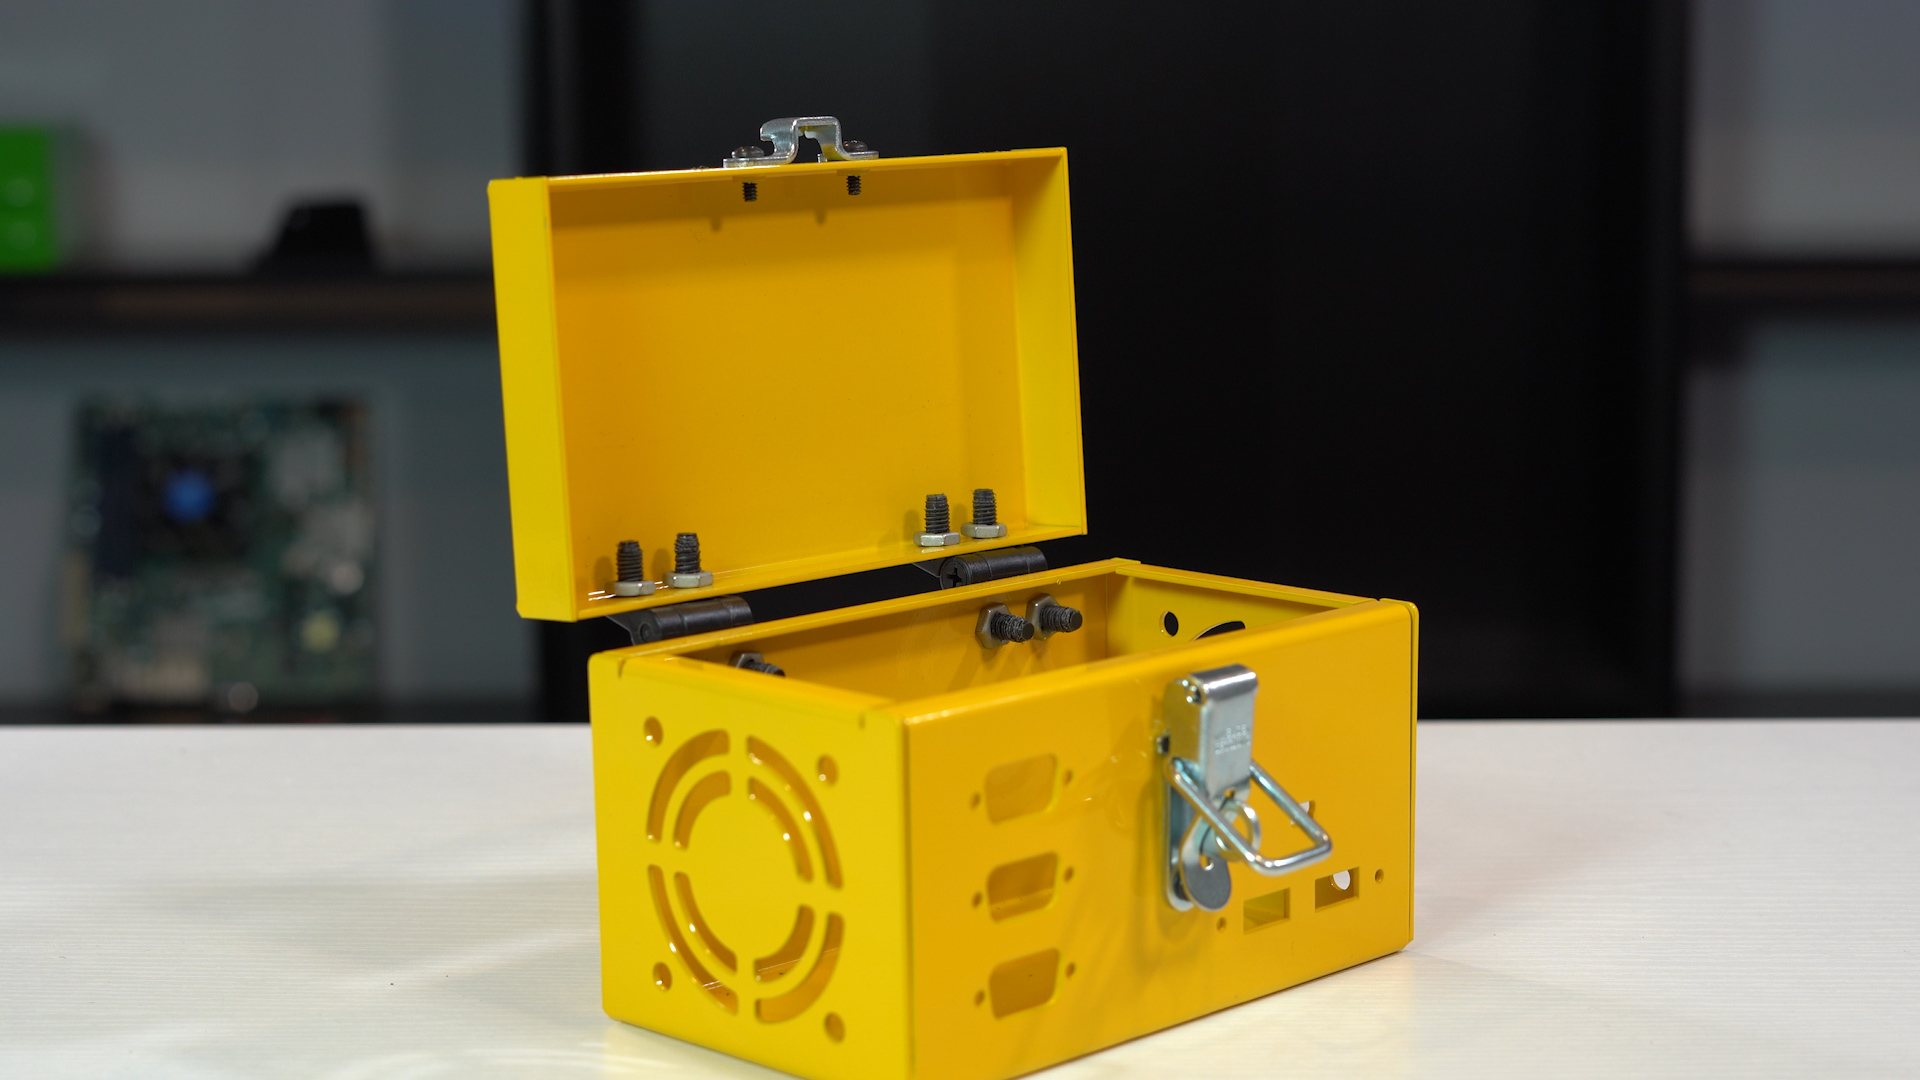
5-Sided enclosure with a hinge installed
Common uses:
Junction boxes
Cabinets, either portable or wall-mounted
Cost-effective option that maintains good resistance to external environments (such as damp environments, or areas where there are a lot of dust or EMI interference).
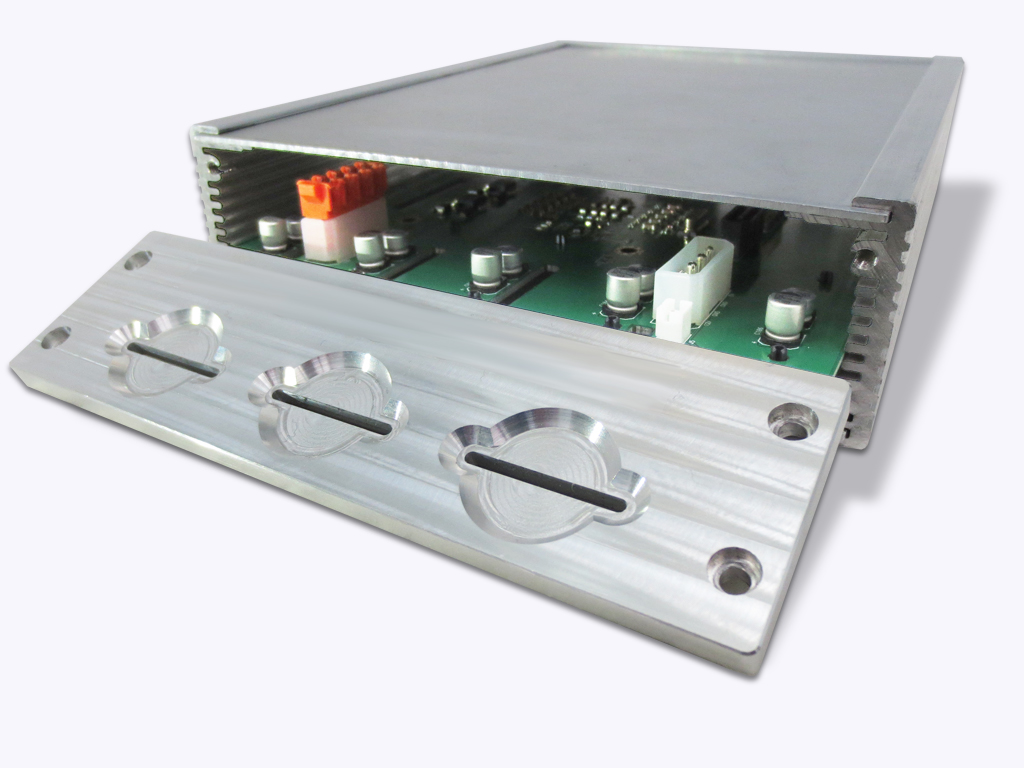
The distinguishing factor of Protocase’s extruded enclosures is their extruded sides, which can be used for mounting PCB boards inside the enclosure.
2U extruded enclosure with rear panel removed.
Much like an L-Shape, an extruded enclosure helps with the issues that arise when there are connectors protruding from multiple or opposite sides. However, keep in mind that connectors ideally should not be placed on any of the extruded sides, as the only way to create cutouts on an extrusion is to CNC machine the cutouts (which means there are limitations to what can be achieved).
Similar to rackmount enclosures, extruded enclosures are measured and classified by “U,” which refers to the height of the extrusion. Protocase currently stocks 1U (1.72″ | 43.688 mm) and 2U (3.47″ | 88.138 mm) aluminum extrusions. (However, we can order non-stock extrusion profiles for additional cost and leadtime).
Extruded aluminum enclosures have a few general rules in regards to the thickness of the front and rear panels, as well as the maximum height, width, and depth, which you can view on our website.
Common uses:
A simple, aesthetically pleasing, sturdy, and low-cost approach to housing components for small or large equipment, such as:
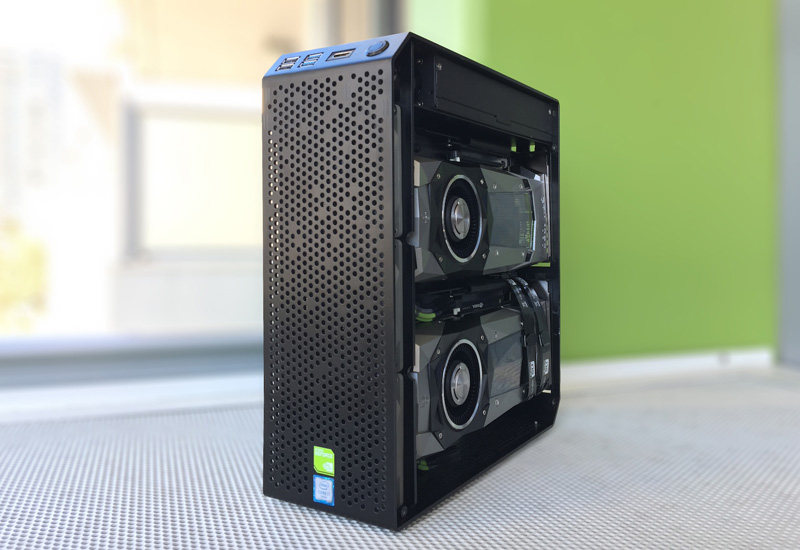
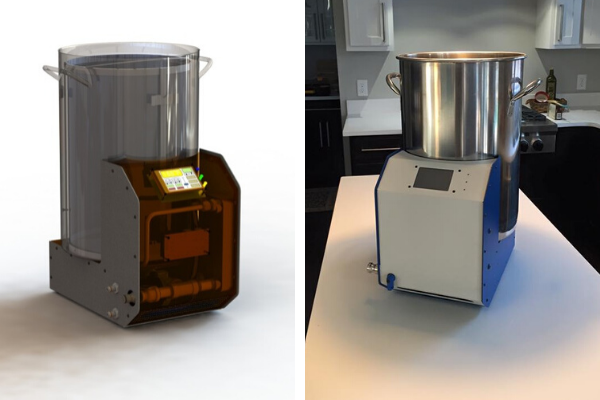
Protocase can build fully custom computer enclosures, big or small. These designs often start off as standard rackmount, U-Shape, L-Shape, ATX, or mini-ITX enclosures. However, unlike an off-the-shelf enclosure that you need to customize manually after you’ve purchased it, we have the ability to add all of the brackets, connectors, and other components that you require within the case to secure all the parts in place.
Project Orthrus 2.0 custom computer enclosure, by Lukasz Dyjakon
You have the option to add any additional components to fit your requirements:
Custom standoffs to mount a motherboard
Cut-outs and fasteners to accommodate power supplies
Drives or drive bays
Ventilation holes and fans
Switches, connectors, and more
If you’re looking to integrate a standard form factor motherboard into your custom enclosure, the common ATX motherboard is universal, powerful, and cost-effective. Also, micro-ATX and mini-ITX motherboards have been developed specifically for applications where small size, low power consumption and minimal noise are desired.
If you are looking to create a custom design for a computer enclosure to accommodate an ATX or mini-ITX motherboard, you can check out this resource, which describes in depth how you can make these designs possible.
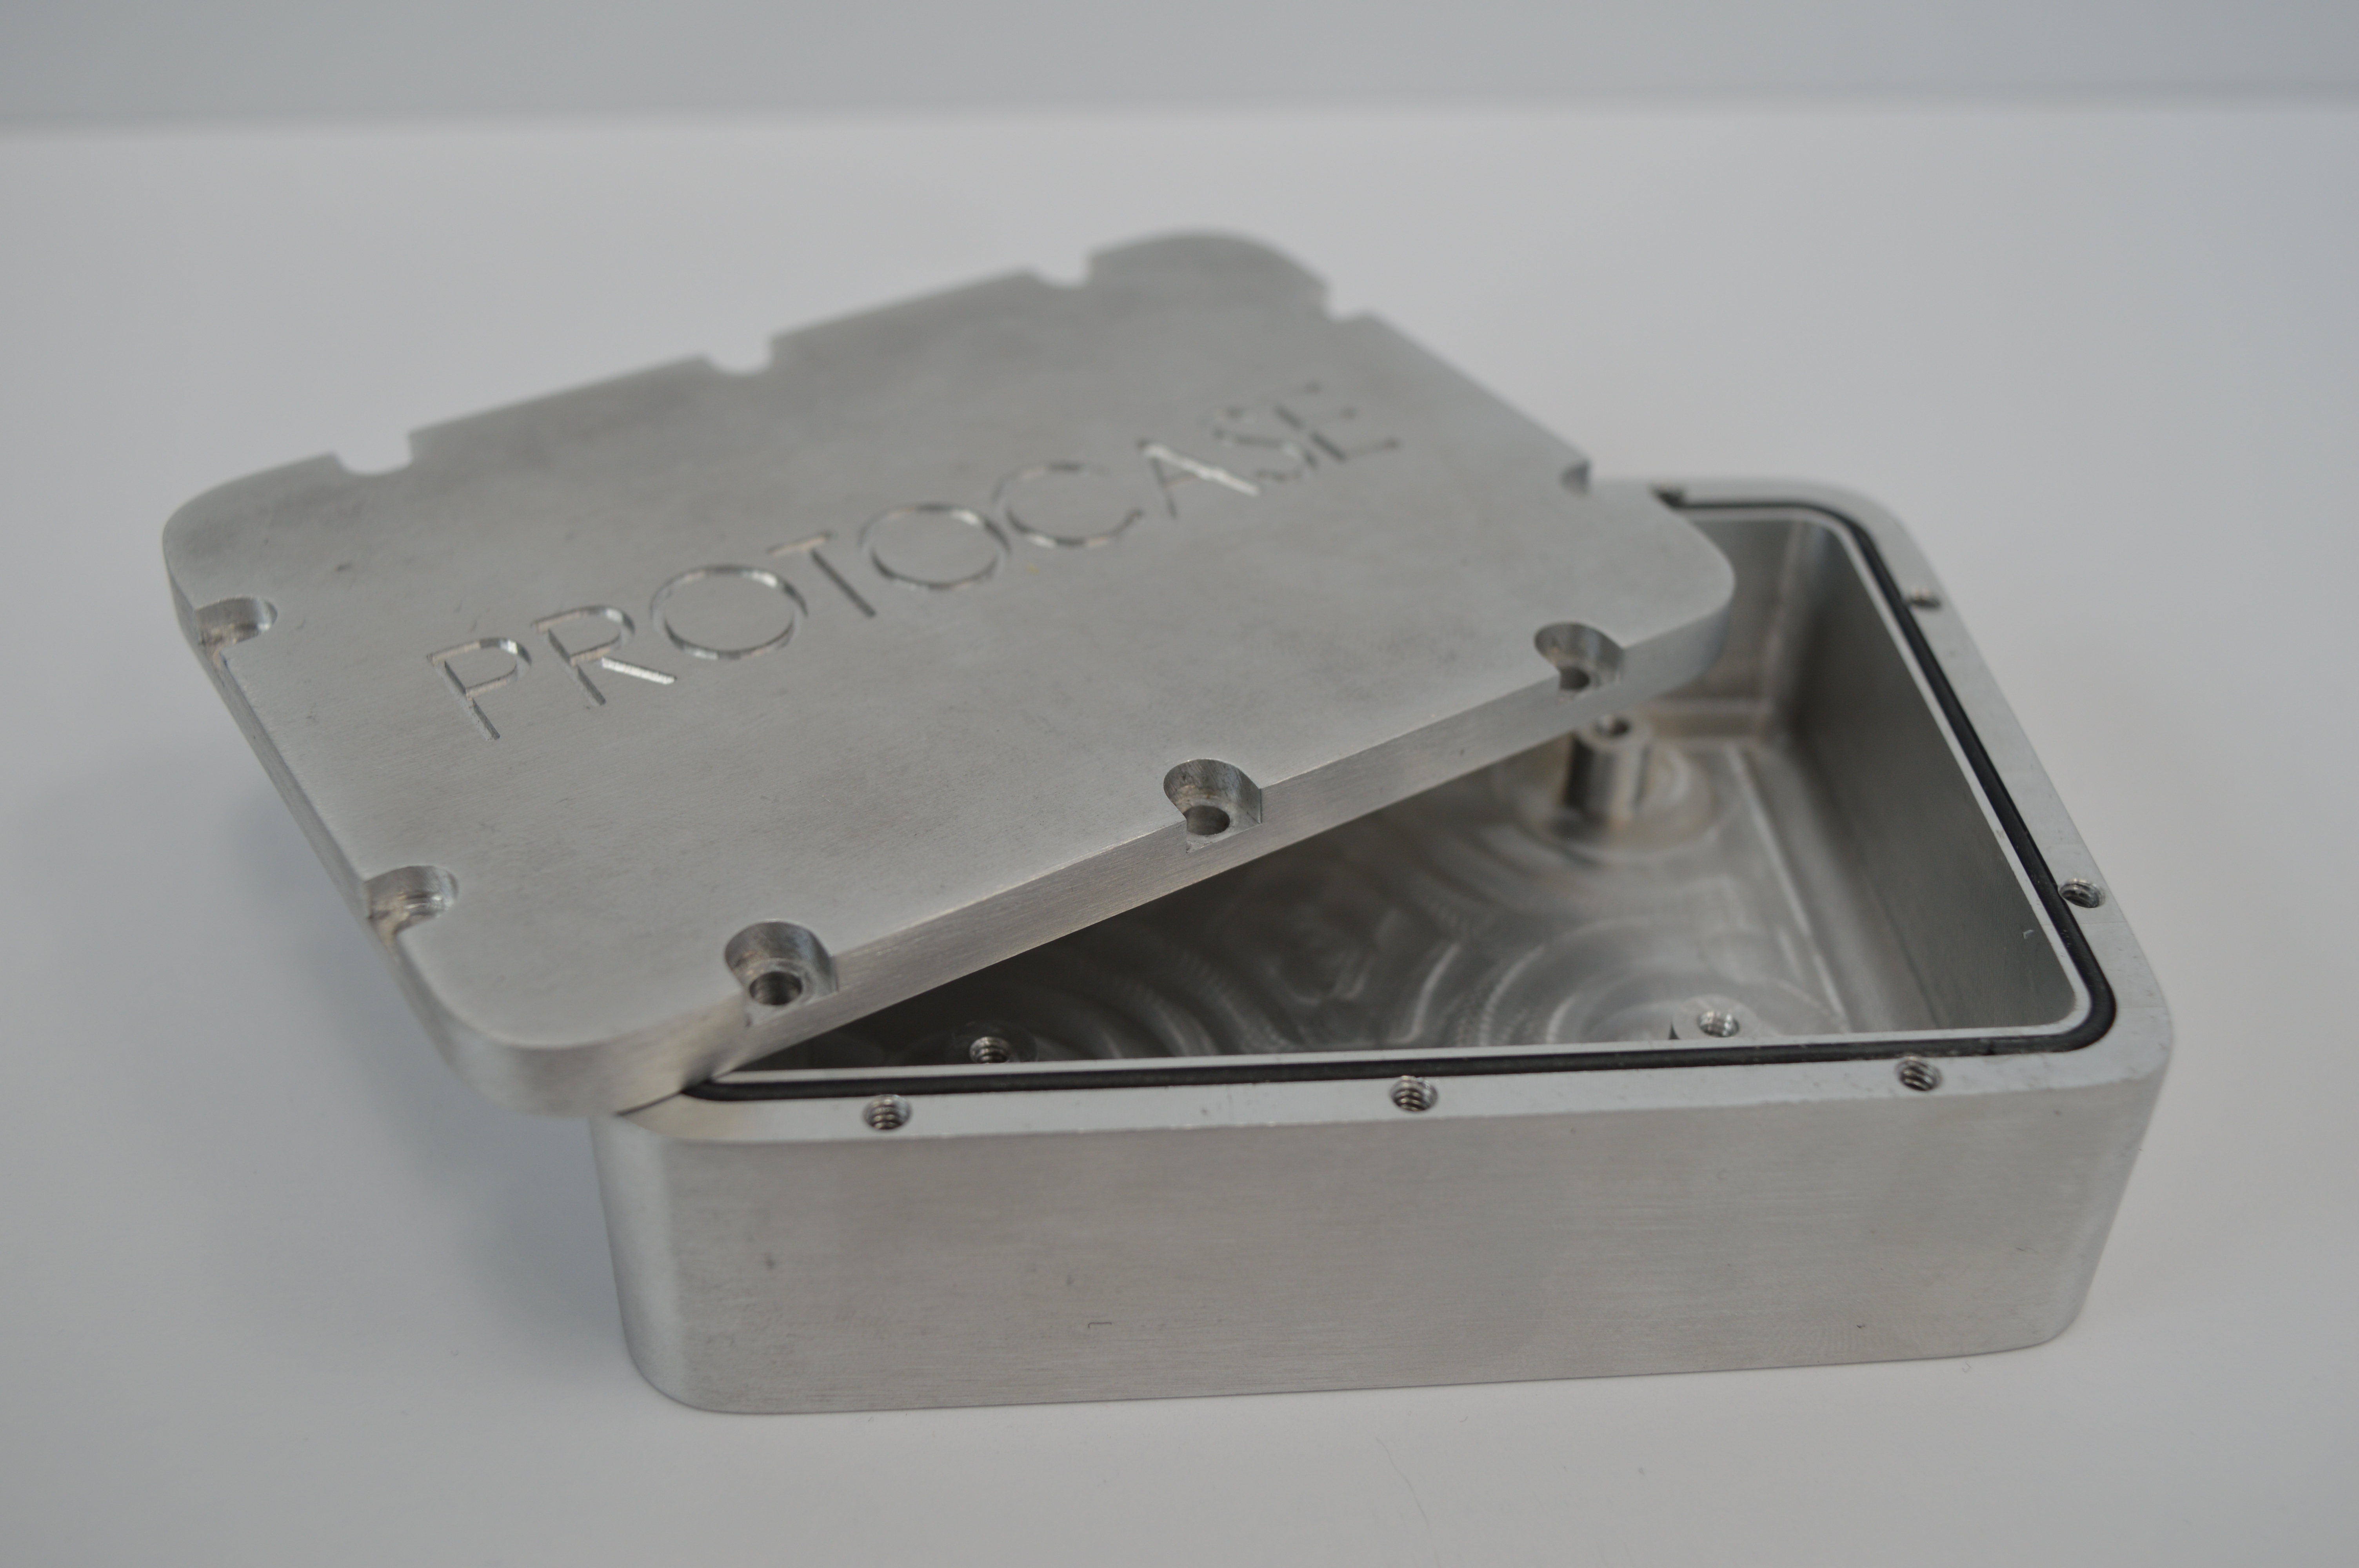
Using 3-axis and 5-axis vertical CNC milling, Protocase is able to mill machined enclosures from solid bar stock. This allows us to create an incredibly durable enclosure with a high level of protection from the elements, and can be highly effective while completely immersed in water.
CNC machined enclosure with gasket installed
If you plan to have your enclosure immersed in water, there are some important design considerations to keep in mind:
The enclosure should be designed in a way to minimize the number of seams that need to be sealed
Aluminum offers great corrosion resistance and is our preferred material for CNC milling
If an O-ring is to be incorporated into the design, it should be kept toward the inside of the holes used to assemble the enclosure to prevent leaking through the fasteners
Machined enclosures are typically milled from aluminum, since that material allows for a quick milling process and cost-effective product. However, we can work with other materials, depending on your requirements.
Common uses:
Ideal for an enclosure that must last in an outdoor environment, or be able to protect the interior from harsh weather such as rain, snow, sleet, and wind.
Best choice for enclosures that need to be water-tight, dust-tight, and dirt resistant.
Best choice for enclosures that need to be immersed in water for extended periods of time
A hybrid enclosure has the combined traits of an extruded enclosure and a machined enclosure. They have a sheet metal top and bottom, custom machined back plates, and extruded sides. The resulting enclosure is both durable and sophisticated. If you require a design that’s solid and durable, that can easily allow for mounting a PCB, a hybrid enclosure is your best option.
Hybrid enclosure with extruded sides and CNC machined front and rear panels.
It is important to keep in mind that due to the extruded sides, a hybrid enclosure cannot be sealed as well as a machined enclosure, which means it is not as effective at protecting the interior against the elements. If you require an enclosure that is effective at protecting against harsh weather, dust, dirt, and water, a machined enclosure would be a better choice.
While we offer hybrid enclosures in virtually any width and depth you require, the height of the enclosure will either be 1.72” (43.688mm) or 3.47” (88.138mm), due to the stocked extruded sides that we offer.
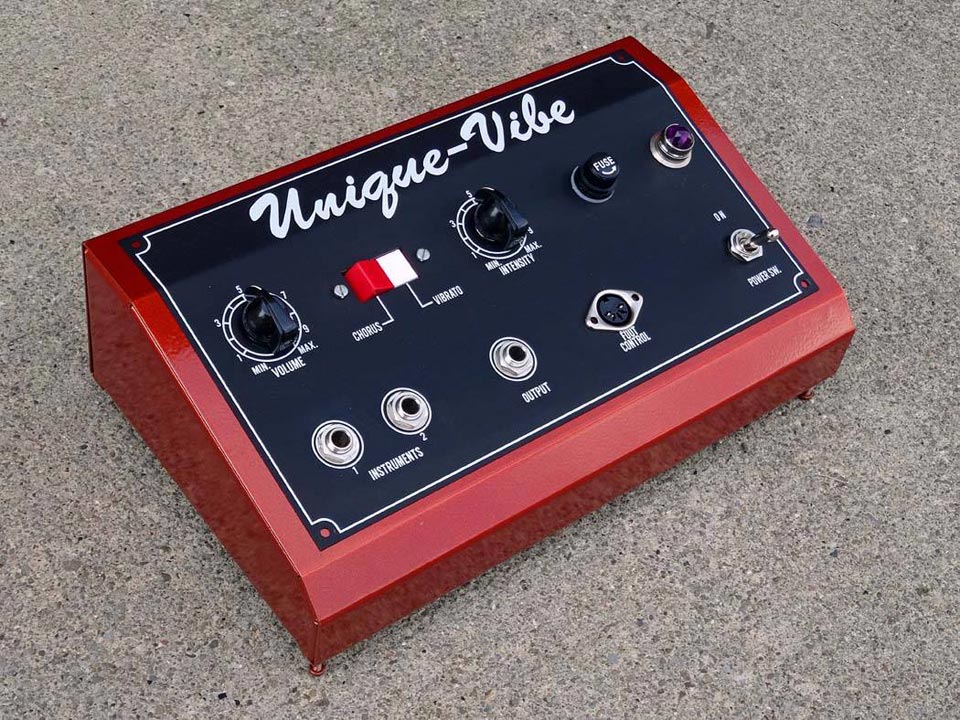
A consolet can be easily distinguished by its angled front, which is the face that contains the working features of the enclosures (such as displays, switches and knobs) so that they can be more easily viewed and accessed.
This type of enclosure is ideal for mounting small control or instrumentation devices where the desired access requires a 30- or 60- degree surface.
Often, customers will have the bottom of these enclosures fitted with rubber feet so that they can be moved around more easily without causing scratches or scrapes to the surface, or damaging the bottom of the enclosure.
Common uses:
Often used by audio-visual companies that have a need for LCD screens that require lots of controls, buttons, or dials.
If none of the enclosure styles listed above appear to meet your design needs, it is likely that you will require a fully custom enclosure. Protocase can manufacture a fully custom enclosure to your exact specifications by either sending us your CAD drawing outlining your design, or working with our expert design services.
Some factors to keep in mind with fully custom enclosures
All of the enclosure styles discussed above are all standardized designs that do not have much variance. A completely custom enclosure, however, has many different design factors to be considered.
When you create a completely new design that includes features such as welding, hinges, cam locks, or electronic components, you will also need to keep tolerances in mind too. Remember – the goal at the end of your project is for all of your components to fit properly when you install them. In order to achieve this, we recommend adding a bit more clearance between moving parts, as well as allowing enough space for the installation and removal of components.
It is helpful to really take a step back and look at the design to ensure that, first and foremost, it is possible to manufacture, and second, it is going to work for your needs and not hinder your original intentions.
For example, a hinged enclosure will typically be welded to one part, and fastened to the other by way of studs/hex nut combo. This is to allow the removal of one of the parts which will help with installation. However, when you throw welding into the mix, it always adds the slight possibility of misalignment. Our welders will use a set of calibrated calipers to measure and align the hinge, and then weld it into place. If this is the case, we always want to add a bit more clearance between the moving parts so that it will open and close smoothly. Another option would be to sacrifice the hinge being welded to one part, and fasten both parts using studs/hex nut combo. This way, the alignment is a lot safer because we are relying on the laser cutting and bending tolerances to position the parts in relation to each other.
Adding in electronic components may also decrease your ability to properly seal an enclosure. Often, we will oversize a mounting hole to allow for powdercoat coverage and other tolerances. So, if you are looking to completely seal your enclosure, you may want to consider using rubber gaskets or washers to help achieve the seal you require.
With so many varied enclosure styles to pick from, the choices can sometimes be daunting. This guide should be able to help you select the style that best suits your needs. Remember, during your decision-making process, it’s a good idea to first consider how you’ll be using the enclosure, where it will be stored, and what electronics and components will be deployed within the enclosure.
Whatever your needs, we are able to fully manufacture the enclosure style you need for your project. We try to make the design process as straightforward by working with you in whatever way is most comfortable for you, as well as possible by providing you design tools:
Template Generator: Start with one of our CAD enclosure templates! You can create a CAD template in one of our enclosure styles based on your required material, thickness and dimensions. Then, use your preferred CAD software to customize the template with cutouts, brackets, fasteners, partitions, hardware and more.
Protocase Designer: If you haven’t already, I highly recommend downloading Protocase Designer, our free enclosure design software. With our software, you can choose from one of our 40+ templates, customize it by material, size and more, and design in minutes what would normally take hours. It is the ideal option streamlining your work, and creating a manufacturable design with less back-and-forth and revisions.
Cutout Library: We have a large collection of cutout patterns for accessories that are commonly used in custom enclosures, including fans, LEDs, switches, receptacles. Download cutout files in either DXF or SolidWorks Part File, then import into your CAD software of choice.
We have many clients who are unable to complete the design themselves, either due to a lack of time due to other pressing projects, or a lack of knowledge in sheet-metal design and fabrication. Protocase is happy to provide Design Services, wherein a member of our Engineering & Design Services will create a custom design based off of your sketches, concepts or components, for a reasonable hourly fee.
Ultimately, we are here to make your design vision a reality in 2-3 days, whatever your particular requirements. If you’re still unsure about which route is best for your design, we are here to help. Contact us by emailing info@protocase.com to discuss your project.
Happy designing!
Newsletter Signup
Sign up to be the first to know about new blog posts and other technical resources